Modifying Locks to Improve Security

Table of Contents
Background #
Note: I’m not a locksmith and this is in no way a replacement for a qualified locksmith. Do not make changes to locks that you depend on, or if you do, it is at your own risk.
Cheap locks are not generally known for being very robust or effective against a suitably-skilled attacker and often have a plethora of flaws. They are trivial to pick, bump, shim or bypass in a number of other ways. It is important to keep in mind that locks are graded by the amount of time they are likely to deter someone, rather than their ability to prevent access altogether. There are a few relatively simple things that can be done to improve the security of a lower budget residential lock, which I will cover in this post.
It is important to remember that residential locks are not comparable to high security commercial locks. It is not possible to modify a $20 lock from the hardware store and expect it to be as secure as a Ruko Merkur 401 or EVVA MCS. With that being said, if you invest in an average quality deadbolt, for example, a Lockwood 001 Deadbolt, there are a few things you can do to somewhat improve the overall security of the lock.
Let’s start by taking a look at some of the factors that make pin-tumbler locks more secure:
- number of pins
- security pins
- key bitting
- modified pin chambers
- sidebars
- restrictive keyway
- key control (restricted keys)
The list above does not cover installation of the lock. During physical engagements, we have seen really secure locks that are poorly installed, which probably deserves its own write-up. However, some quick wins include:
- use a solid, secure door
- strike plate reinforcement
- lock reinforcement plate
- door hinge reinforcement plate
- use longer screws for strike plate and hinges (to penetrate studs)
- be aware of spacing under or on the sides of the door (making them susceptible to ‘under the door tool’ and shimming)
Basics #
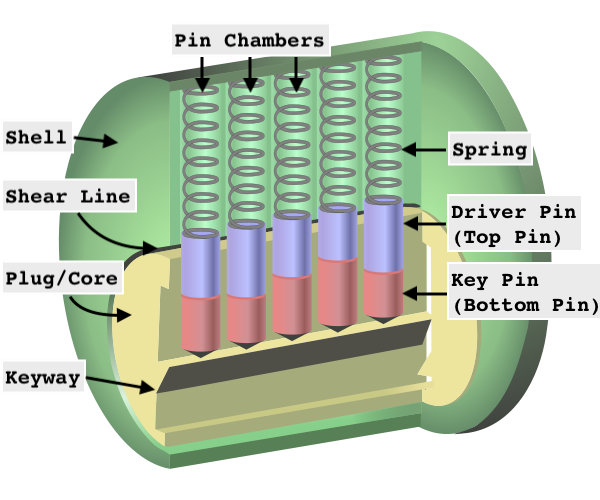
Before getting into the details, let’s quickly cover some of the basic parts of a pin tumbler lock and common terminology. These terms and additional useful information can be found over at the lockwiki - http://lockwiki.com/index.php/Pin-tumbler
Key Pins (Bottom Pins) #
The pins that are touched by the key. Key pins are sized differently corresponding to the different depth cuts on the key. When the correct key is inserted, the tops of all of the key pins are aligned at the shear line, allowing the plug to rotate.
Driver Pins (Top Pins) #
The pins placed between the key pins and the springs. In their resting position, the driver pins block rotation of the plug. In more advanced pin-tumblers, driver pins may be sized inverse to the key pins to defend against decoding and impressioning attacks, as well as overlifting techniques such as comb picking.
Pin Chambers #
Vertical chambers that the pin stacks rest in and move up and down in.
Springs #
Springs placed above the pin stacks push pins into their resting position, ensuring that pins cannot be trapped above the shear line while the plug is in the default position.
Plug (Core) #
The plug is the inner piece of the lock that rotates upon insertion and turning of the correct key. The plug is connected to the cam to actuate the bolt mechanism when rotated.
Cylinder (Bible) #
The cylinder is the outer piece of the lock that houses the upper pin chambers and the plug. Driver pins and springs are trapped in the cylinder’s pin chambers when the correct key is used and the plug rotated.
Methodology #
Since all the information in this post is already available online, my approach was to validate the various techniques used by “challenge lock” creators such as flywheel and many others.
I pinned up my practice lock with individual security pins, as well as various combinations of security pins and then attempt to pick the lock, to observe and validate how pins behave and find combinations that work well together.
The intention of improving a lock’s security is to not only outright stop an unskilled attack such as raking or bumping, but also to provide confusing feedback to an experienced picker and increase the time, effort and tools required to pick the lock.
Modifications #
Let’s focus on the factors that we can control (to some degree) as the lock owner to slightly increase the overall security of a consumer grade lock. One of the first places to start is rekeying the lock, which allows us to change the bitting, add additional pins (if there are empty chambers), as well as adding and optimising the security pins.
Rekeying the Lock #
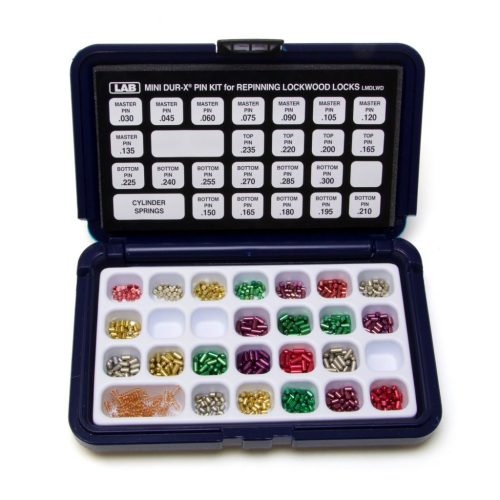
There are several tools which can make repinning a lock easier, such as pinning tweezers, plug followers and repinning kits (specific to each lock manufacturer):


Key Bitting #
Key bitting is the height of the cuts made in the key which lift the pins in the lock towards the shear line, allowing the key to actuate the locking mechanism and unlock the lock.
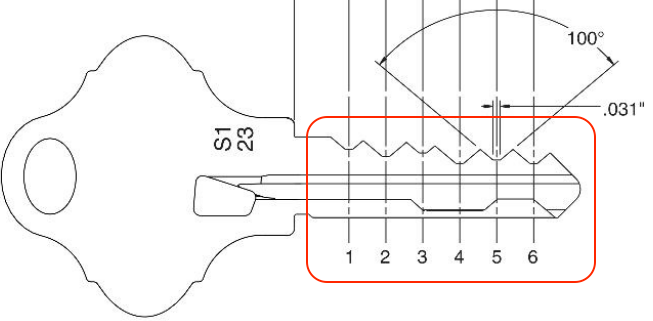
Due to the largely randomised key bitting applied by manufacturers, many locks end up with relatively flat (similar height) bitting that makes picking and lower-skilled attacks like raking much faster. We can alter the key bitting to make it harder to pick and rake the lock due to oversetting (lifting the key pin past the shear line). This can be done by using a high-low bitting order.
By having one short key pin behind a long key pin results in the shaft of the pick oversetting the long pin when trying to push the short pin to the shear line if an especially deep hook is not used. This can be seen in the image below. Conversely, the long key pin makes it easier to overset this pin if using a deep hook or aggressive raking.
The following video covers this topic in more detail: https://www.youtube.com/watch?v=fffL-kmmi4E
It is important to refer to the manufacturer’s bitting specification chart and respect the Maximum Adjacent Cut Specification (MACS). This defines how deep cuts can be next to each other. Having the adjacent cut too agressive can make a key that is difficult to insert and to take out, which adds stress and wear and tear to the lock.
Number of Pins #
Some (not all) locks have six pin chambers, but only five have been populated - sometimes for different destination markets, or simply to save on costs during the manufacturing process. A quick way to increase the security of the lock is to repin the lock and populate the sixth pin chamber.
This will require a new key being cut, however, changing the key bitting (which we cover later) will render the original key unusable anyway.
Security Pins #
As per the lockwiki:
A security pin is a modified version of a driver or key pin in a pin-tumbler lock that makes manipulation more difficult. Security pins are commonly designed to prevent lockpicking, but are also designed to resist decoding, impressioning, key bumping, and other compromise techniques.
There are many different types of security pins. Without listing them all, here are some examples:
- spool
- serrated
- spoorated
- mushroom
- rattle snake
- pin in pin
- hybrid (mixture of above)
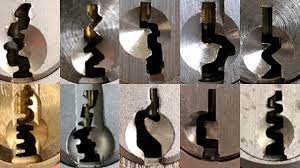
The image below from the lockpicking reddit ( https://www.reddit.com/r/lockpicking/comments/elmxe0/commercial_pin_types/) shows a few of these examples:
Keep in mind, you don’t want to replace all of the pins in the lock with security pins. This will increase the wear and tear on the lock and make the lock sticky/hard to use (even with the proper key).
Making Custom Security Pins: #
Making your own custom security pins can be a lot of fun. However, I noticed some tools work better for certain tasks. Repinning kits contain a variety of different length driver and key pins, or if you know the sizes you need, you can also buy them individually.
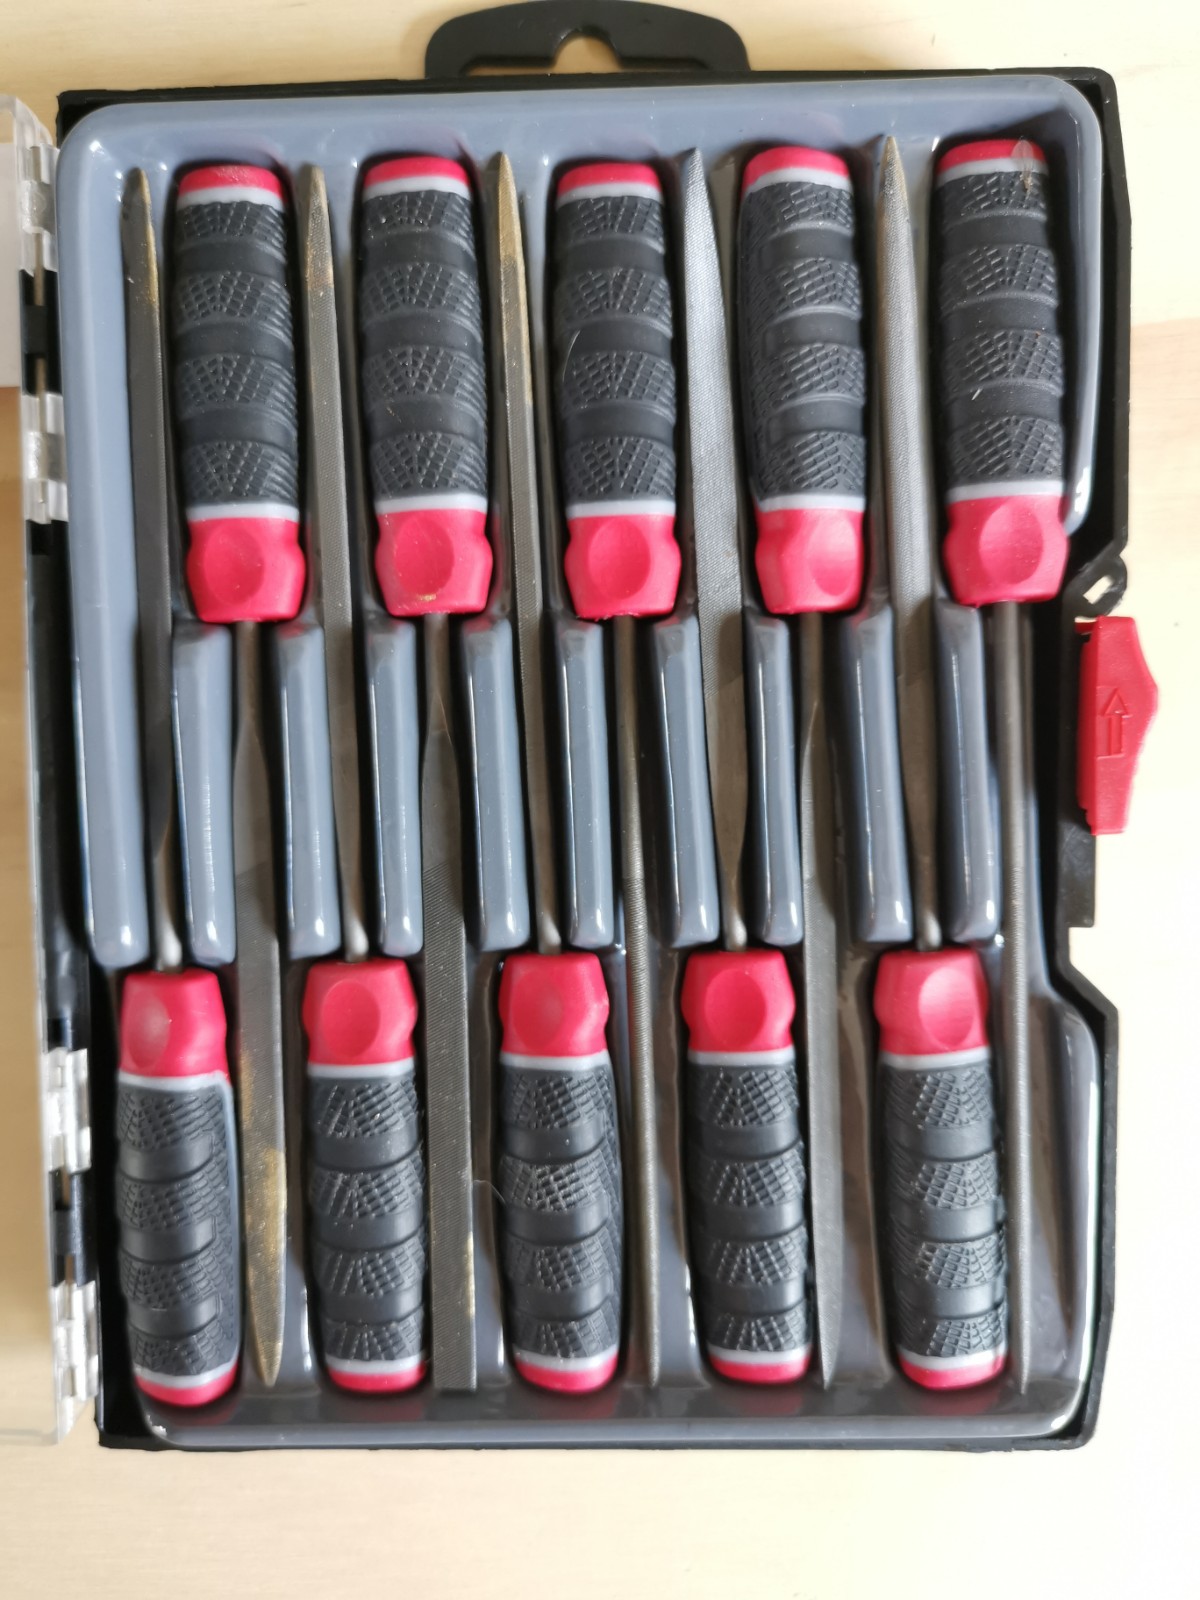
Here is a short list of tools that will come in handy:
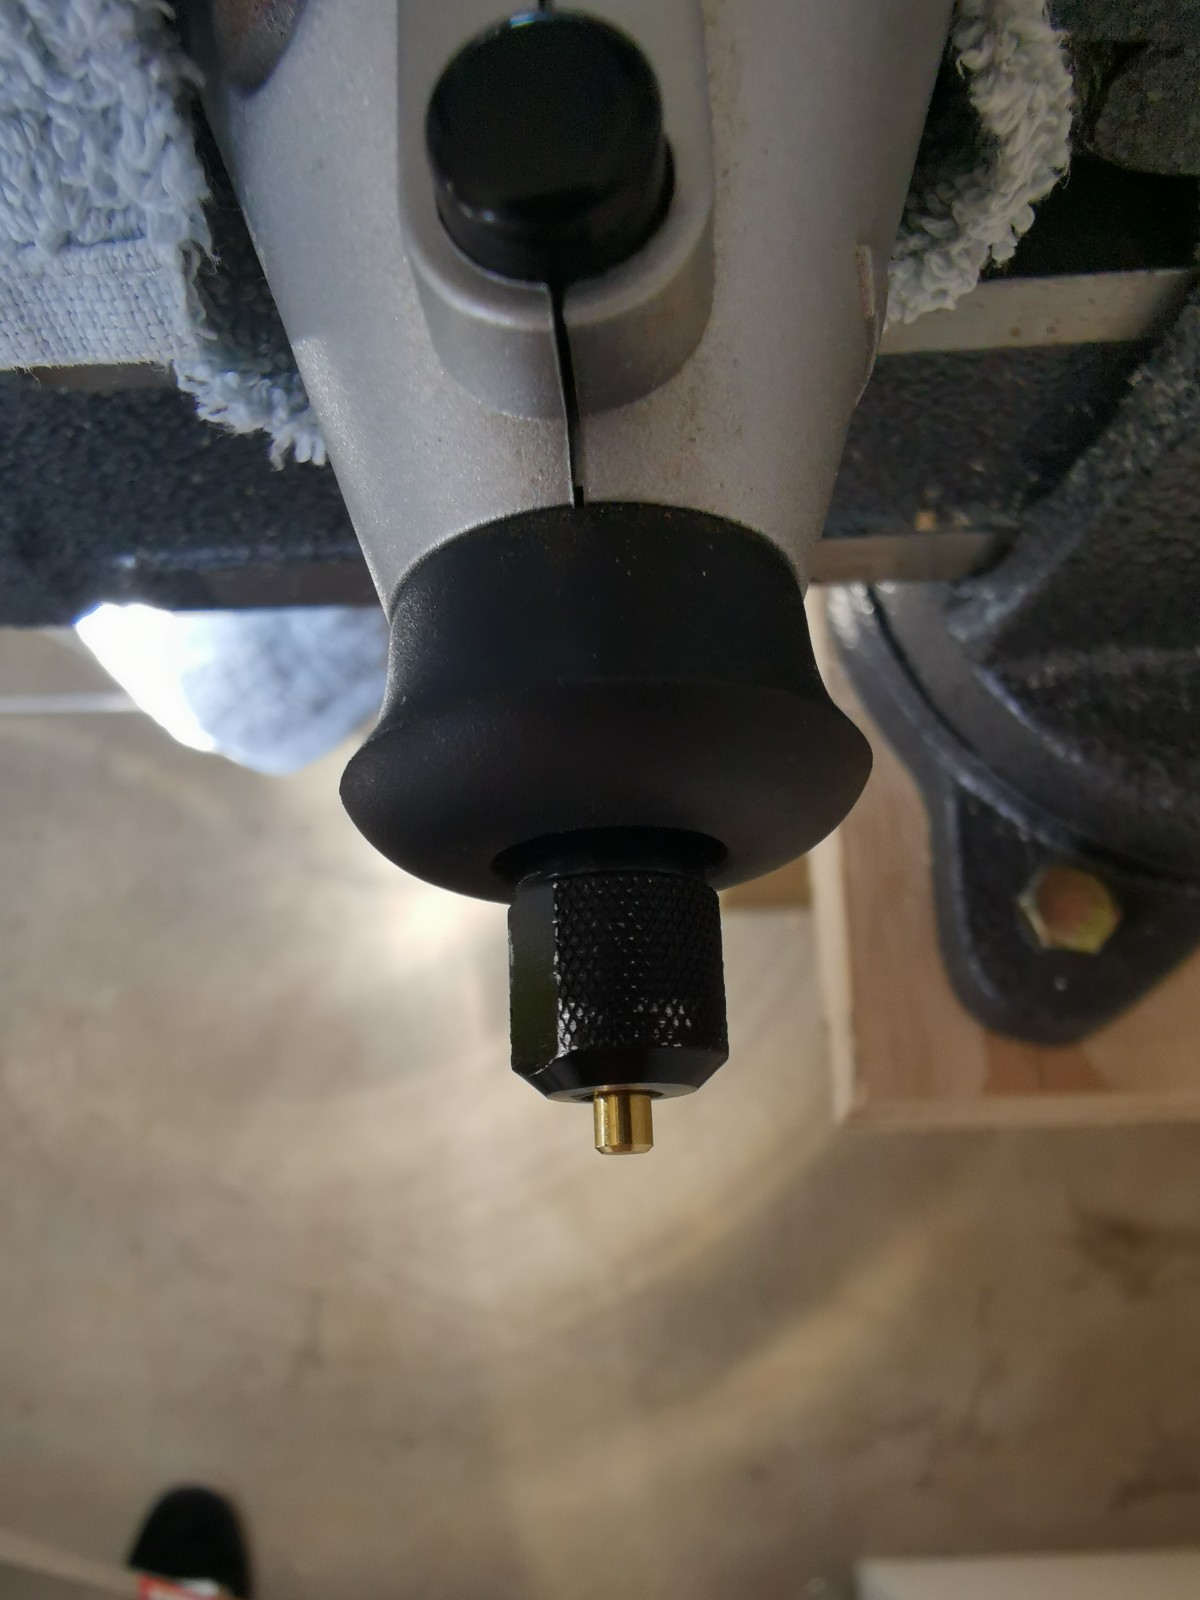
- rotary tool (like a dremel to hold and spin the pin)
- set of small files (for spool and mushroom pins)
- xacto saw (for serrated pins)
- small drill bits (for pin in pin)

| Mini File Set | Rotary Tool |
|---|---|
|
|
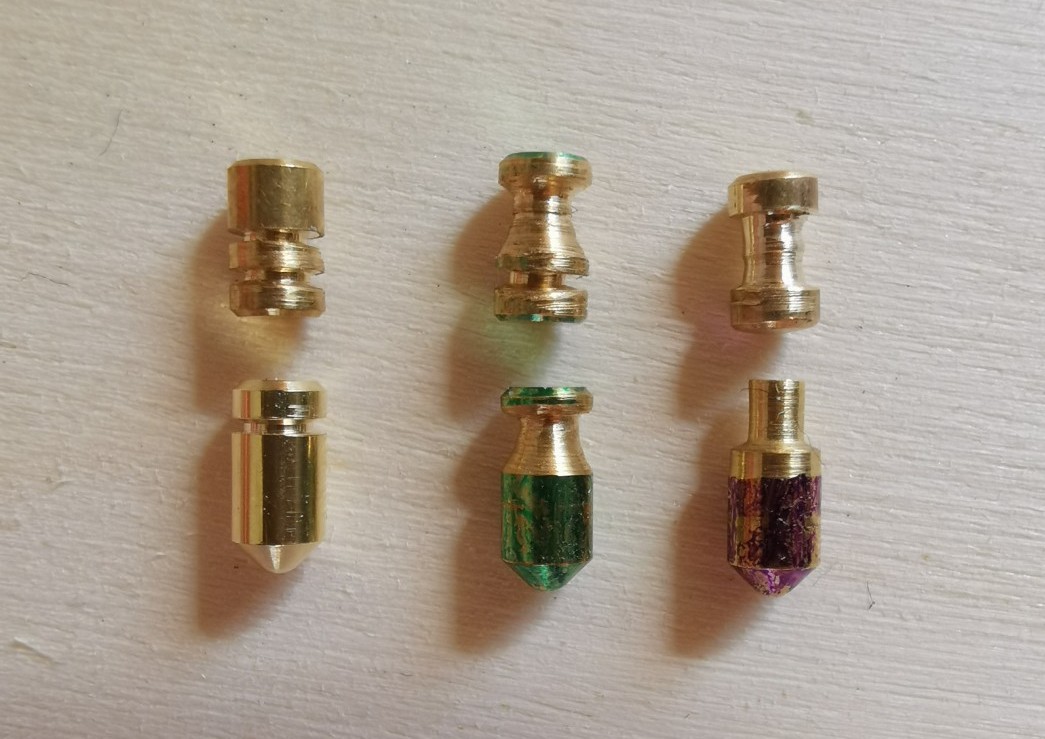
There is a bit of a learning curve that generally comes with trial and error, such as using an xacto saw to create serrated pins instead of using a file.
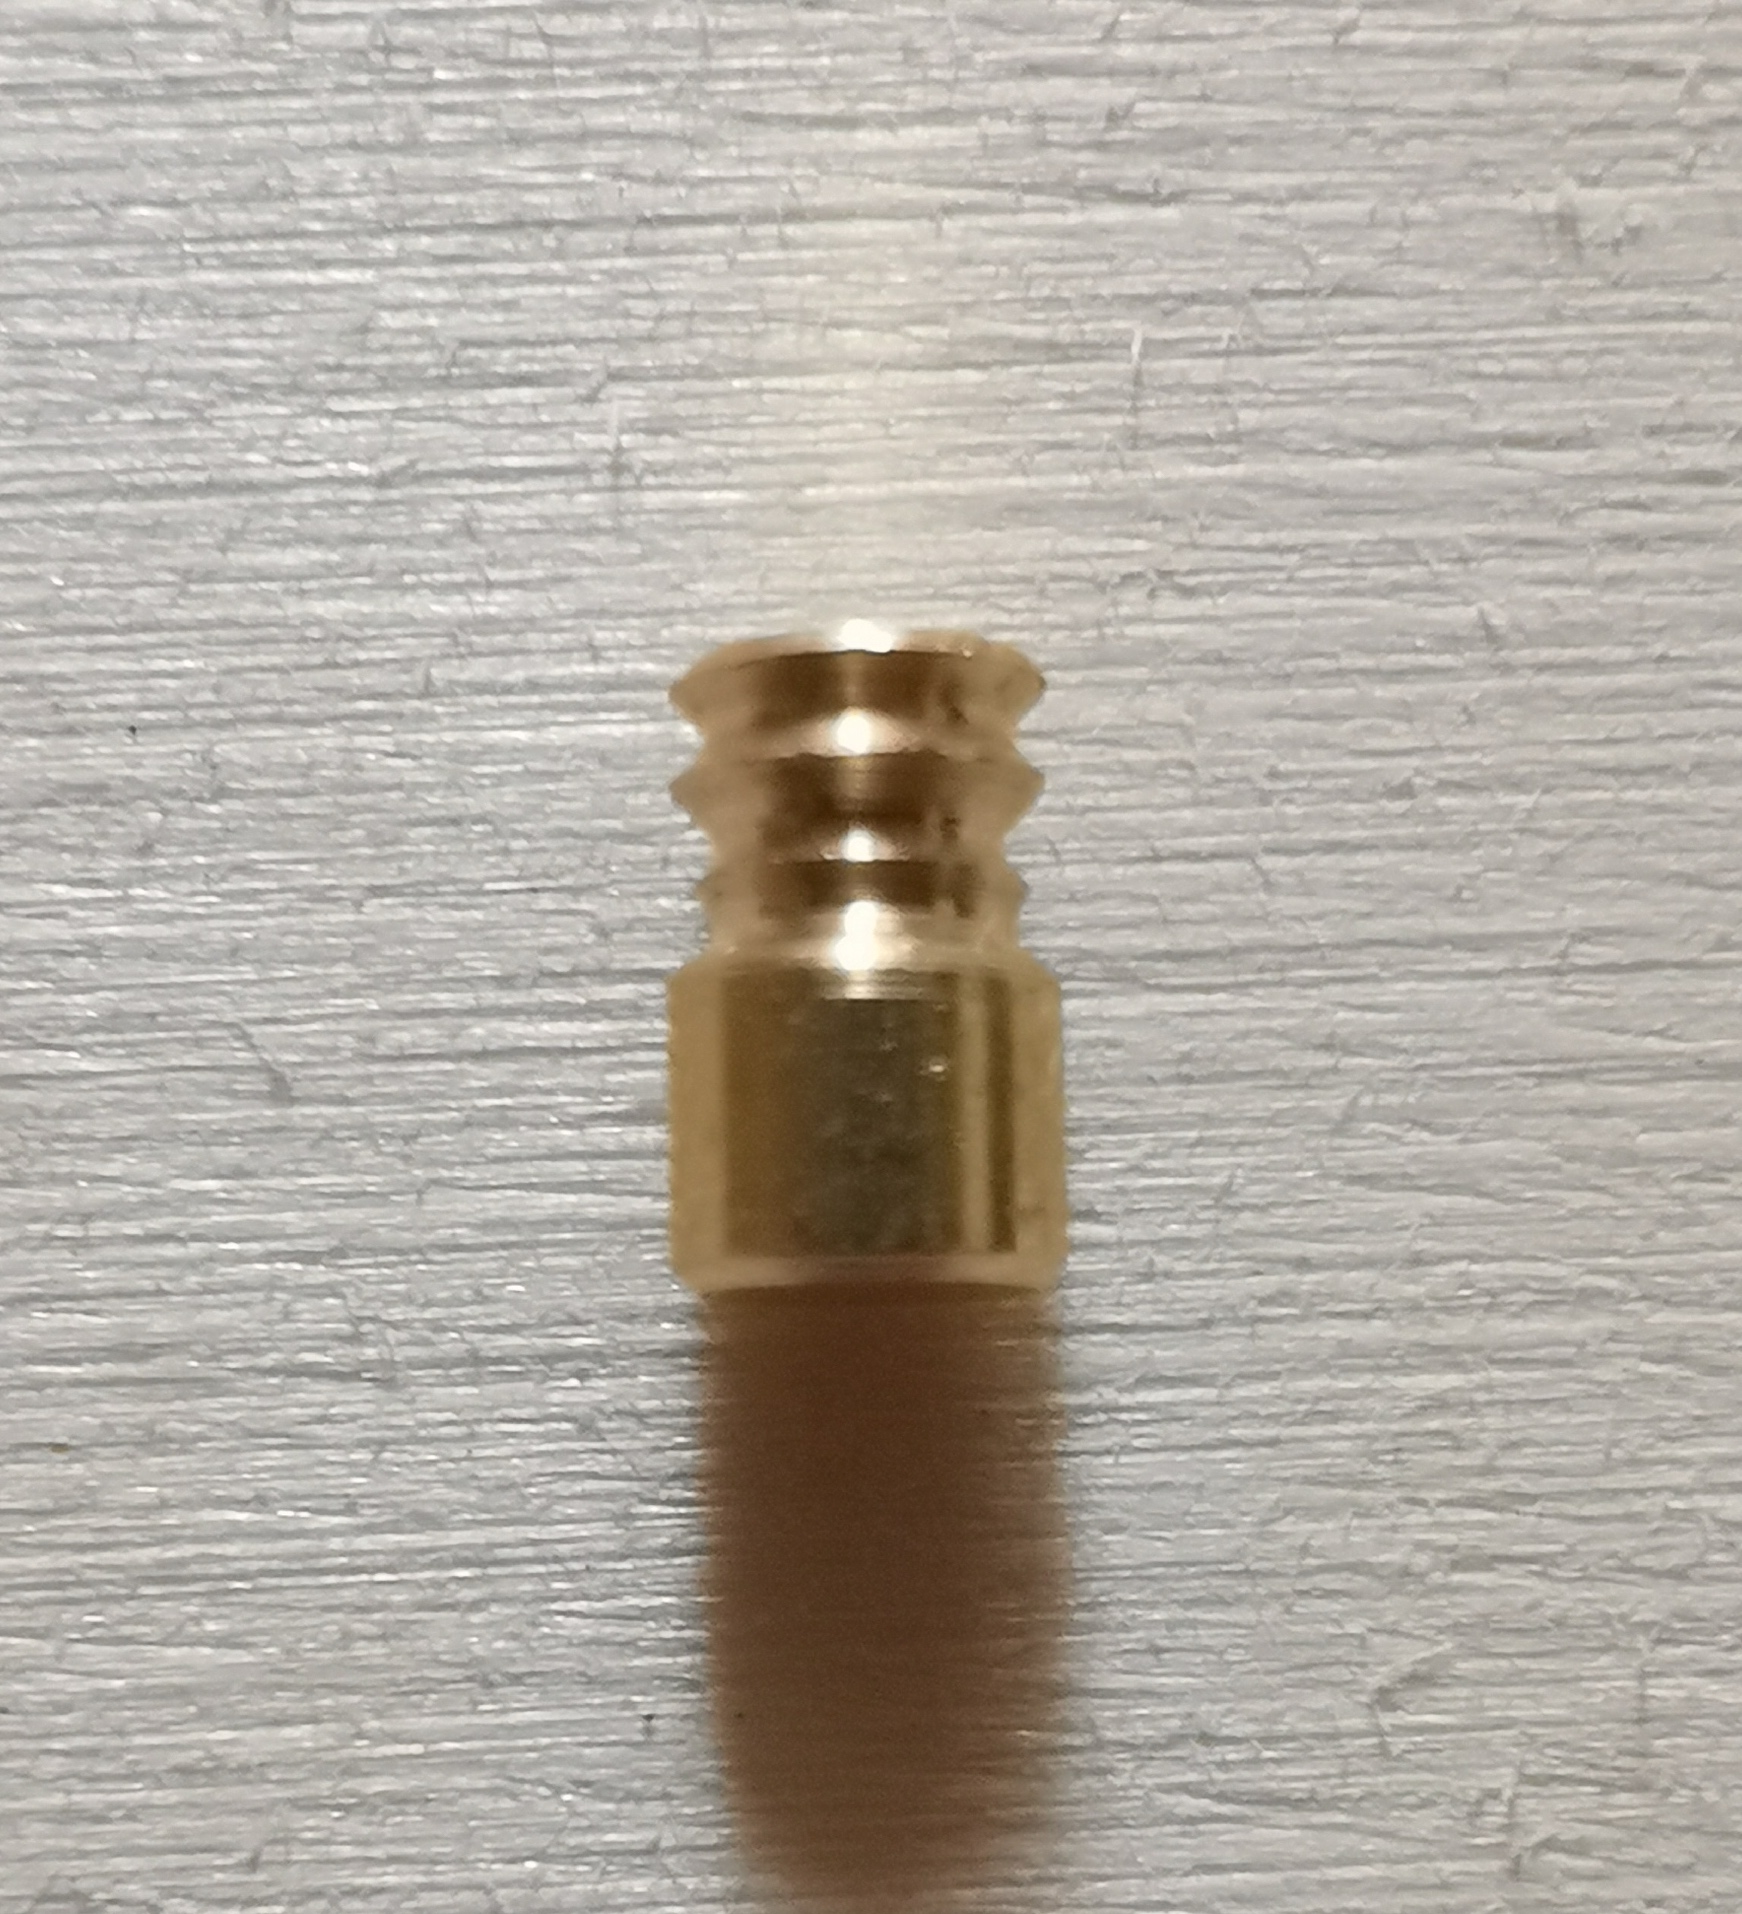
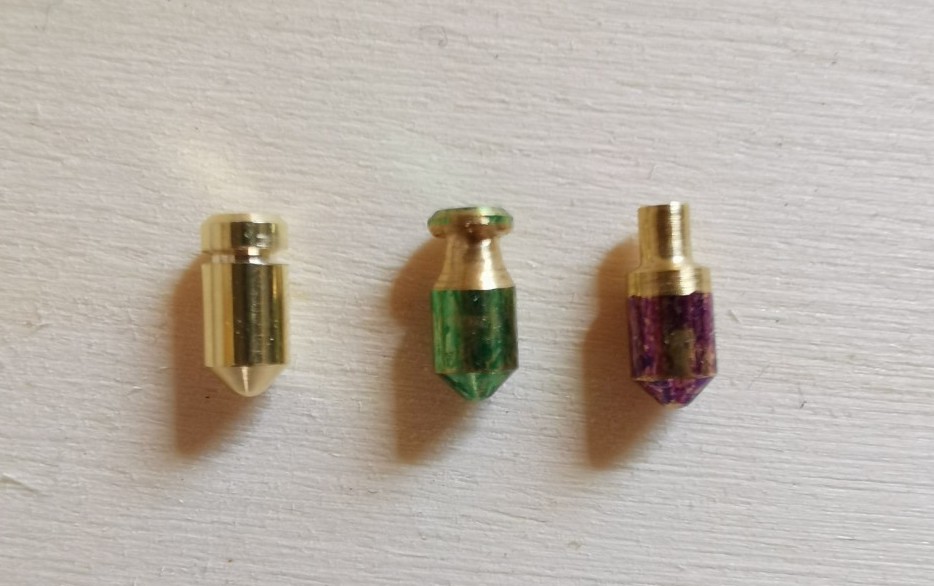
The serrated pin on the left was created with a file, whilst the one on the right was created using an xacto saw. As you can see, the serrations are a lot sharper when an xacto saw is used.
| Serrated using File | Serrated using Xacto Saw |
|---|---|
|
|
Most lock manufacturers only seem to create security pins for the driver pins and very few (especially lower budget locks) will have any modified key pins. Key pins with serrations will catch on the shear line and threads (if the pin chamber is threaded), making the lock harder to pick, especially when combined with a high-low key bitting order.
If you’re modifying pins, make sure that the pin diameter is not excessively reduced, as this can make the lock operate unreliably or more susceptible to destructive attacks.
Optimizing Security Pins #
When repinning a lock with security pins, randomly placing pins in various chambers (as done by many manufacturers) may not deliver the desired result.
For example, placing a spool pin in a chamber with a long key pin means that the edge of the spool pin is always above the shear line, and the spool pin never comes into play. There is essentially no added benefit of this configuration.
To maximise the effectiveness of the security pins, the following guidelines should be kept in mind:
- spool pins are most effective over shorter key pins
- spool pins are more effective when a strong spring is used
- serrated pins are most effective over longer key pins
- serrated pins are more effective when both driver and key pins have serrations
- serrated pins work well in threaded pin chambers
Cylinder and Plug Modifications #
Threading Pin Chambers #
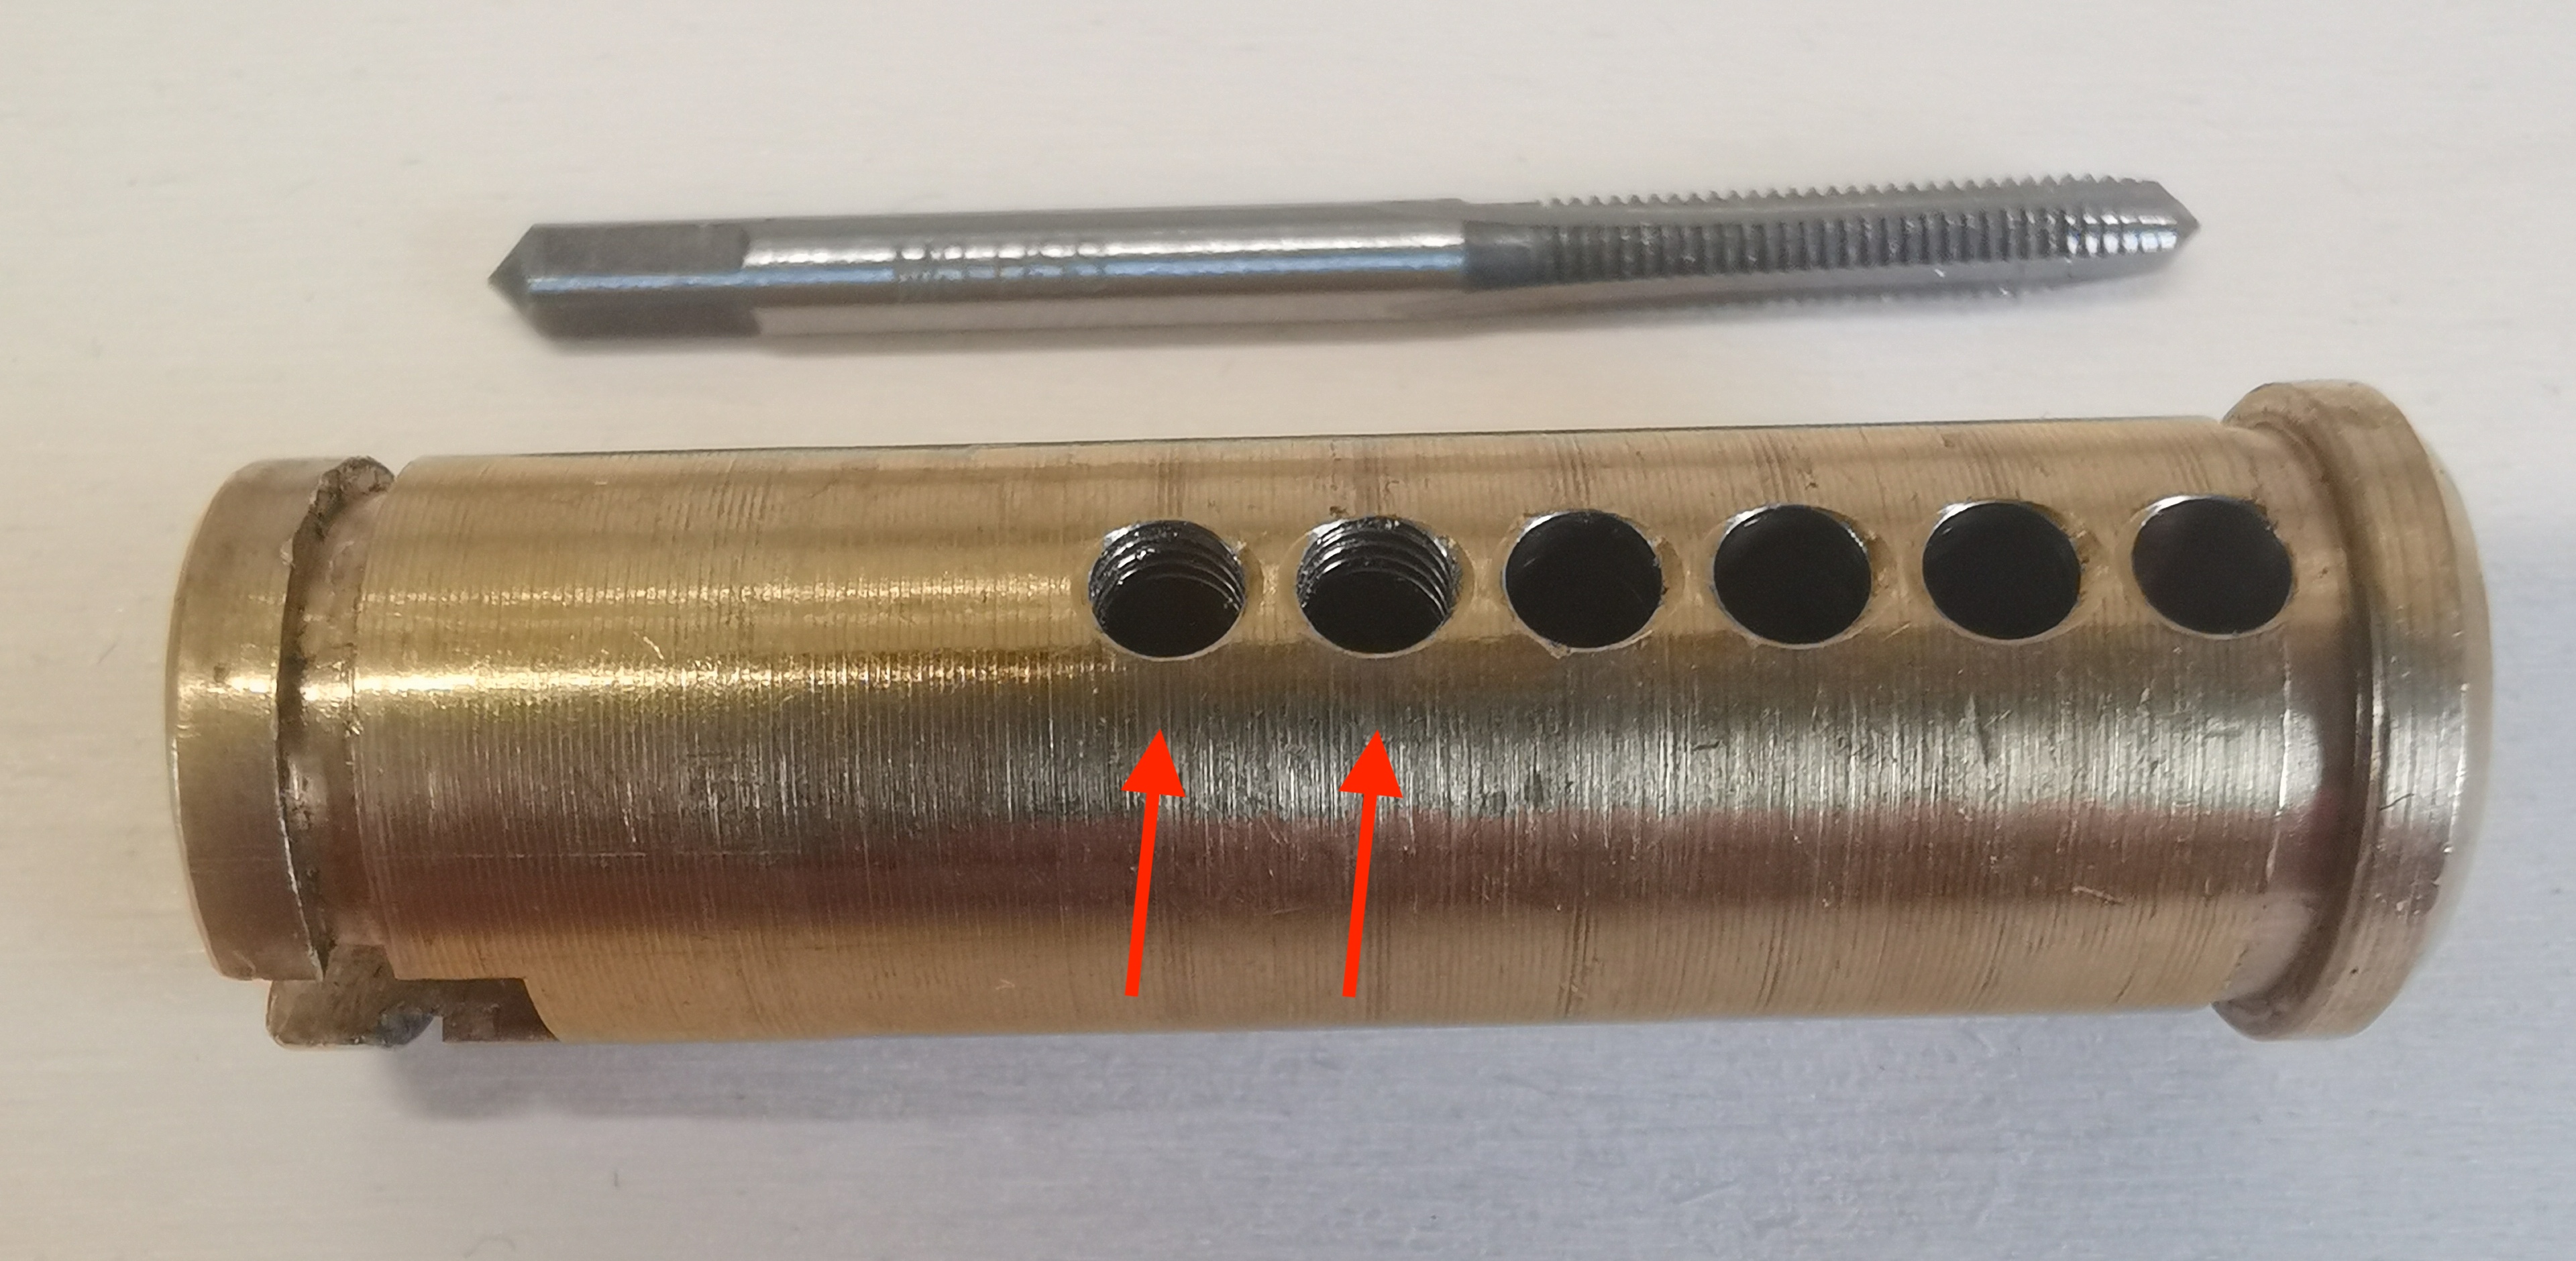
Threading pin chambers is a tricky job. Both the plug and the upper pin chamber (in the bible/cylinder) can be threaded. However, tapping the pin chambers may harm tight tolerances in the lock and make picking easier. It is important that if you attempt to tap the pin chambers, that you use an appropriately sized tap, which does not widen the pin chamber.
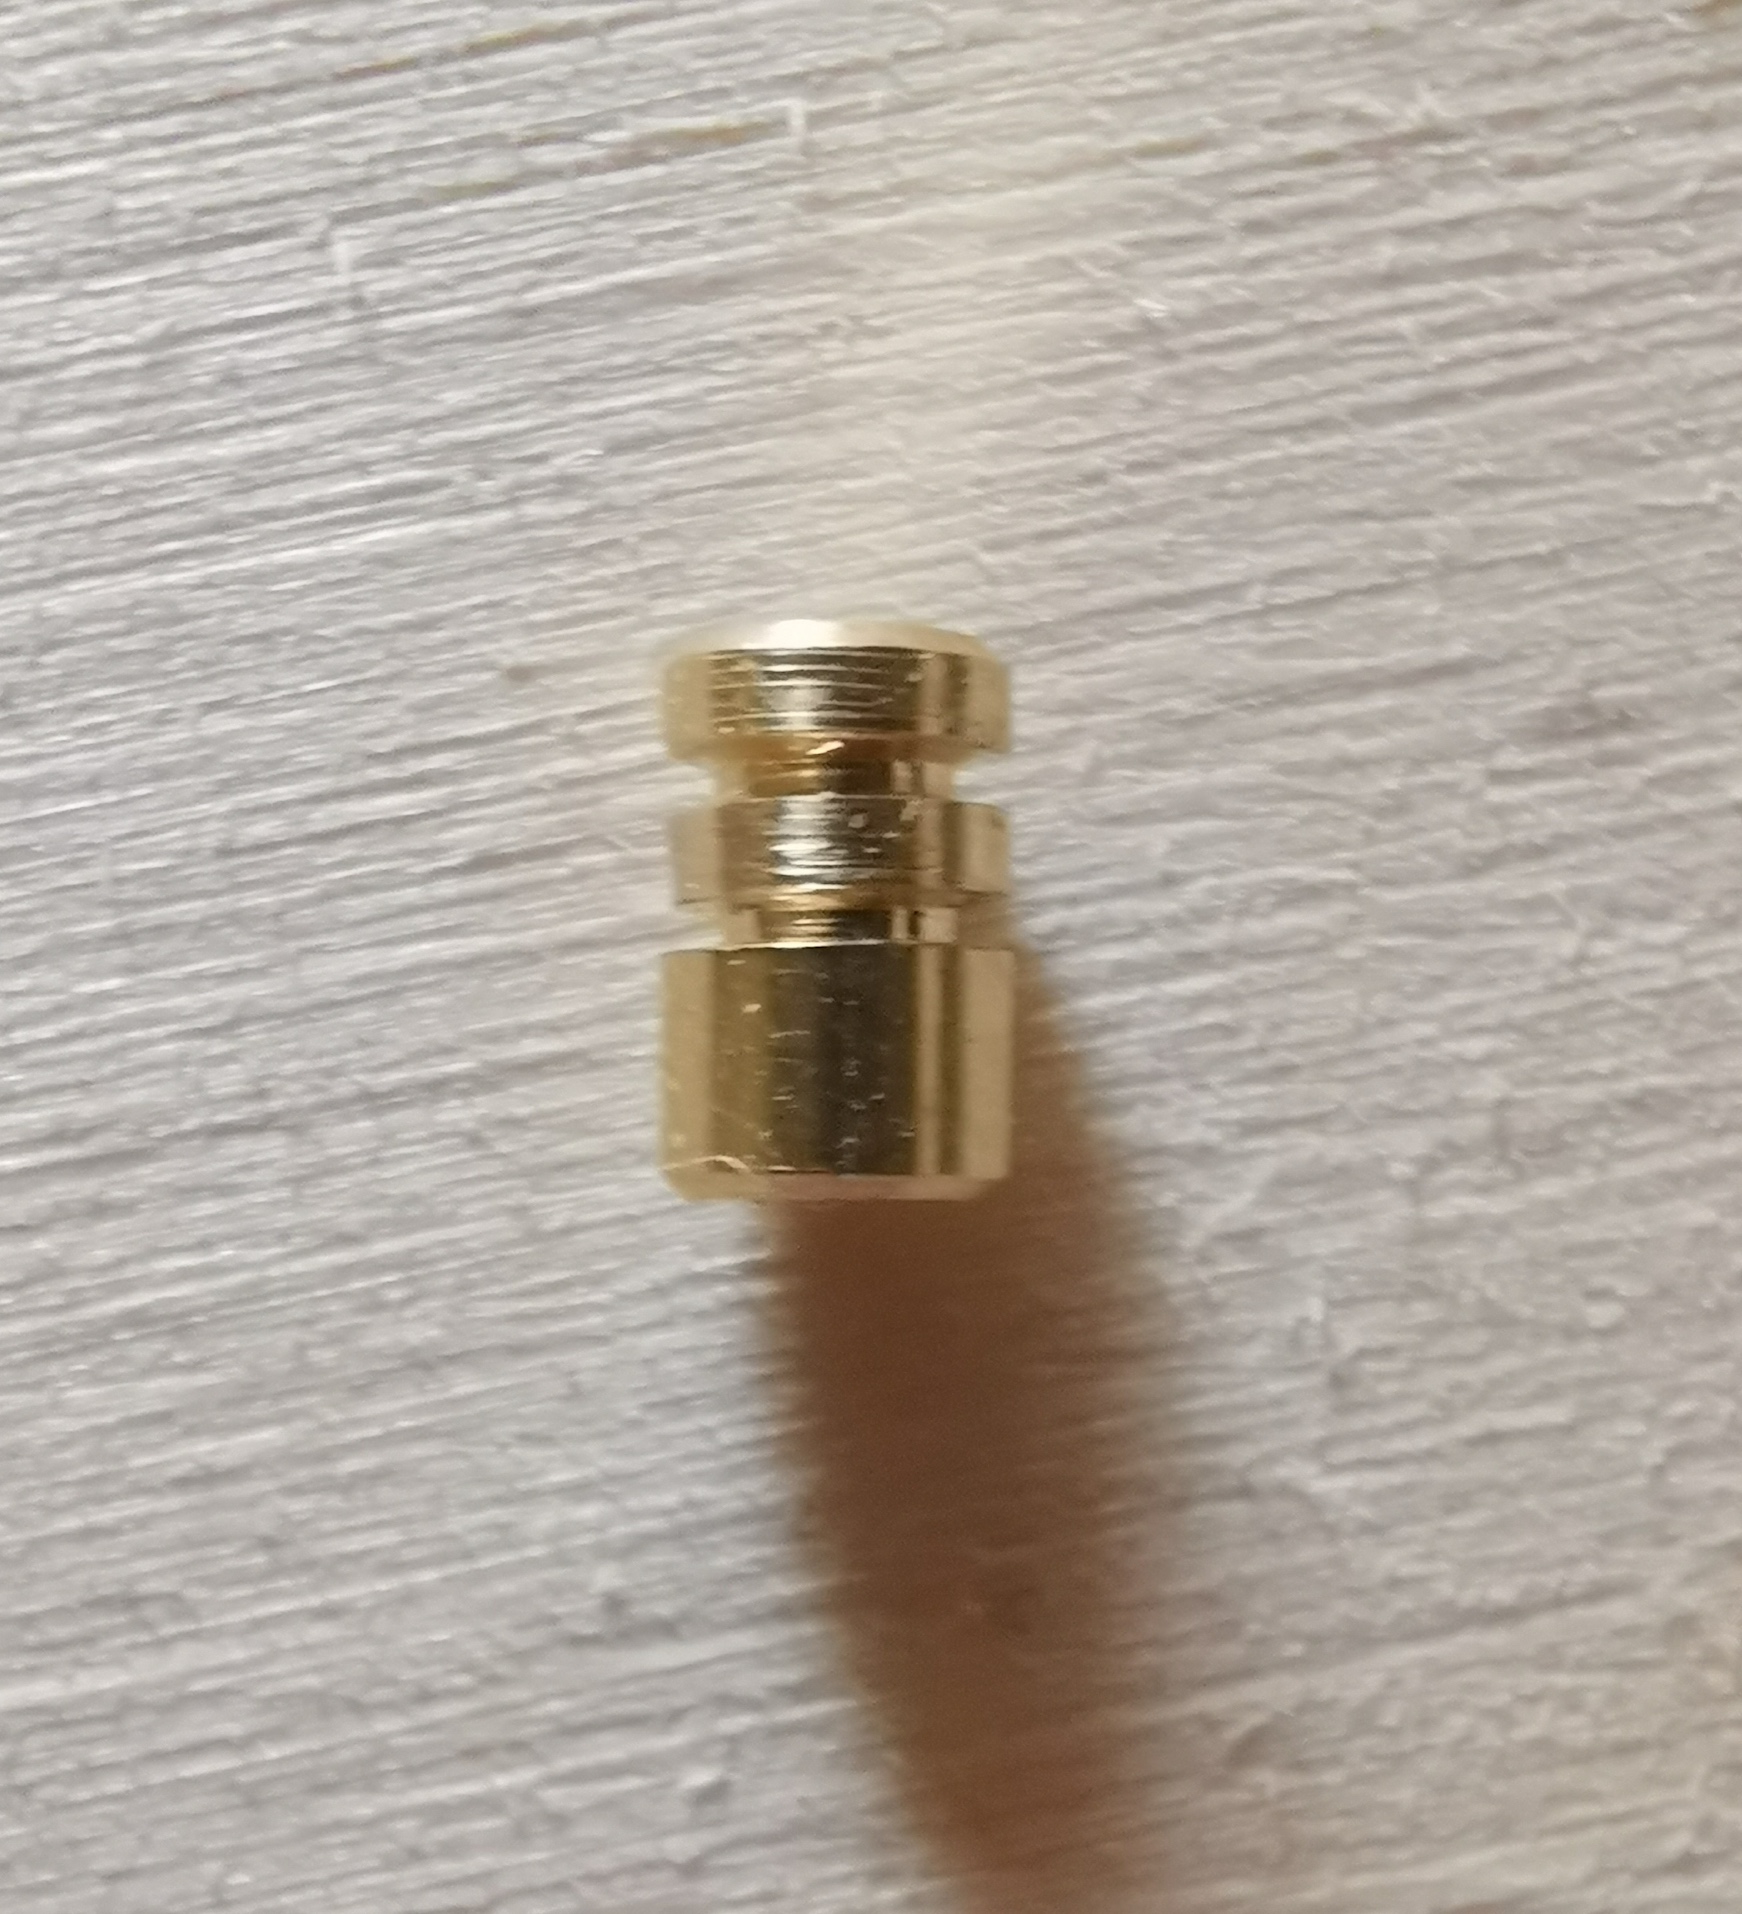
For the plug shown below, an M3 tap was used to thread the two pin chambers on the left.
Springs #
Using strong springs in combination with spool pins makes raking a lock a lot more difficult and can prevent a pick from being withdrawn from the keyway.
This can be seen in the following video: https://youtu.be/_NZeOOYI3Lg?t=249
Mixing spring types and using extra strong or double springs can also help to resist kinetic attacks such as bumping.
Key Control #
Key control (restricted key) is a system of administering key blanks to prevent locksmiths from cutting additional keys, unless an authorised party has explicitly allowed them to.
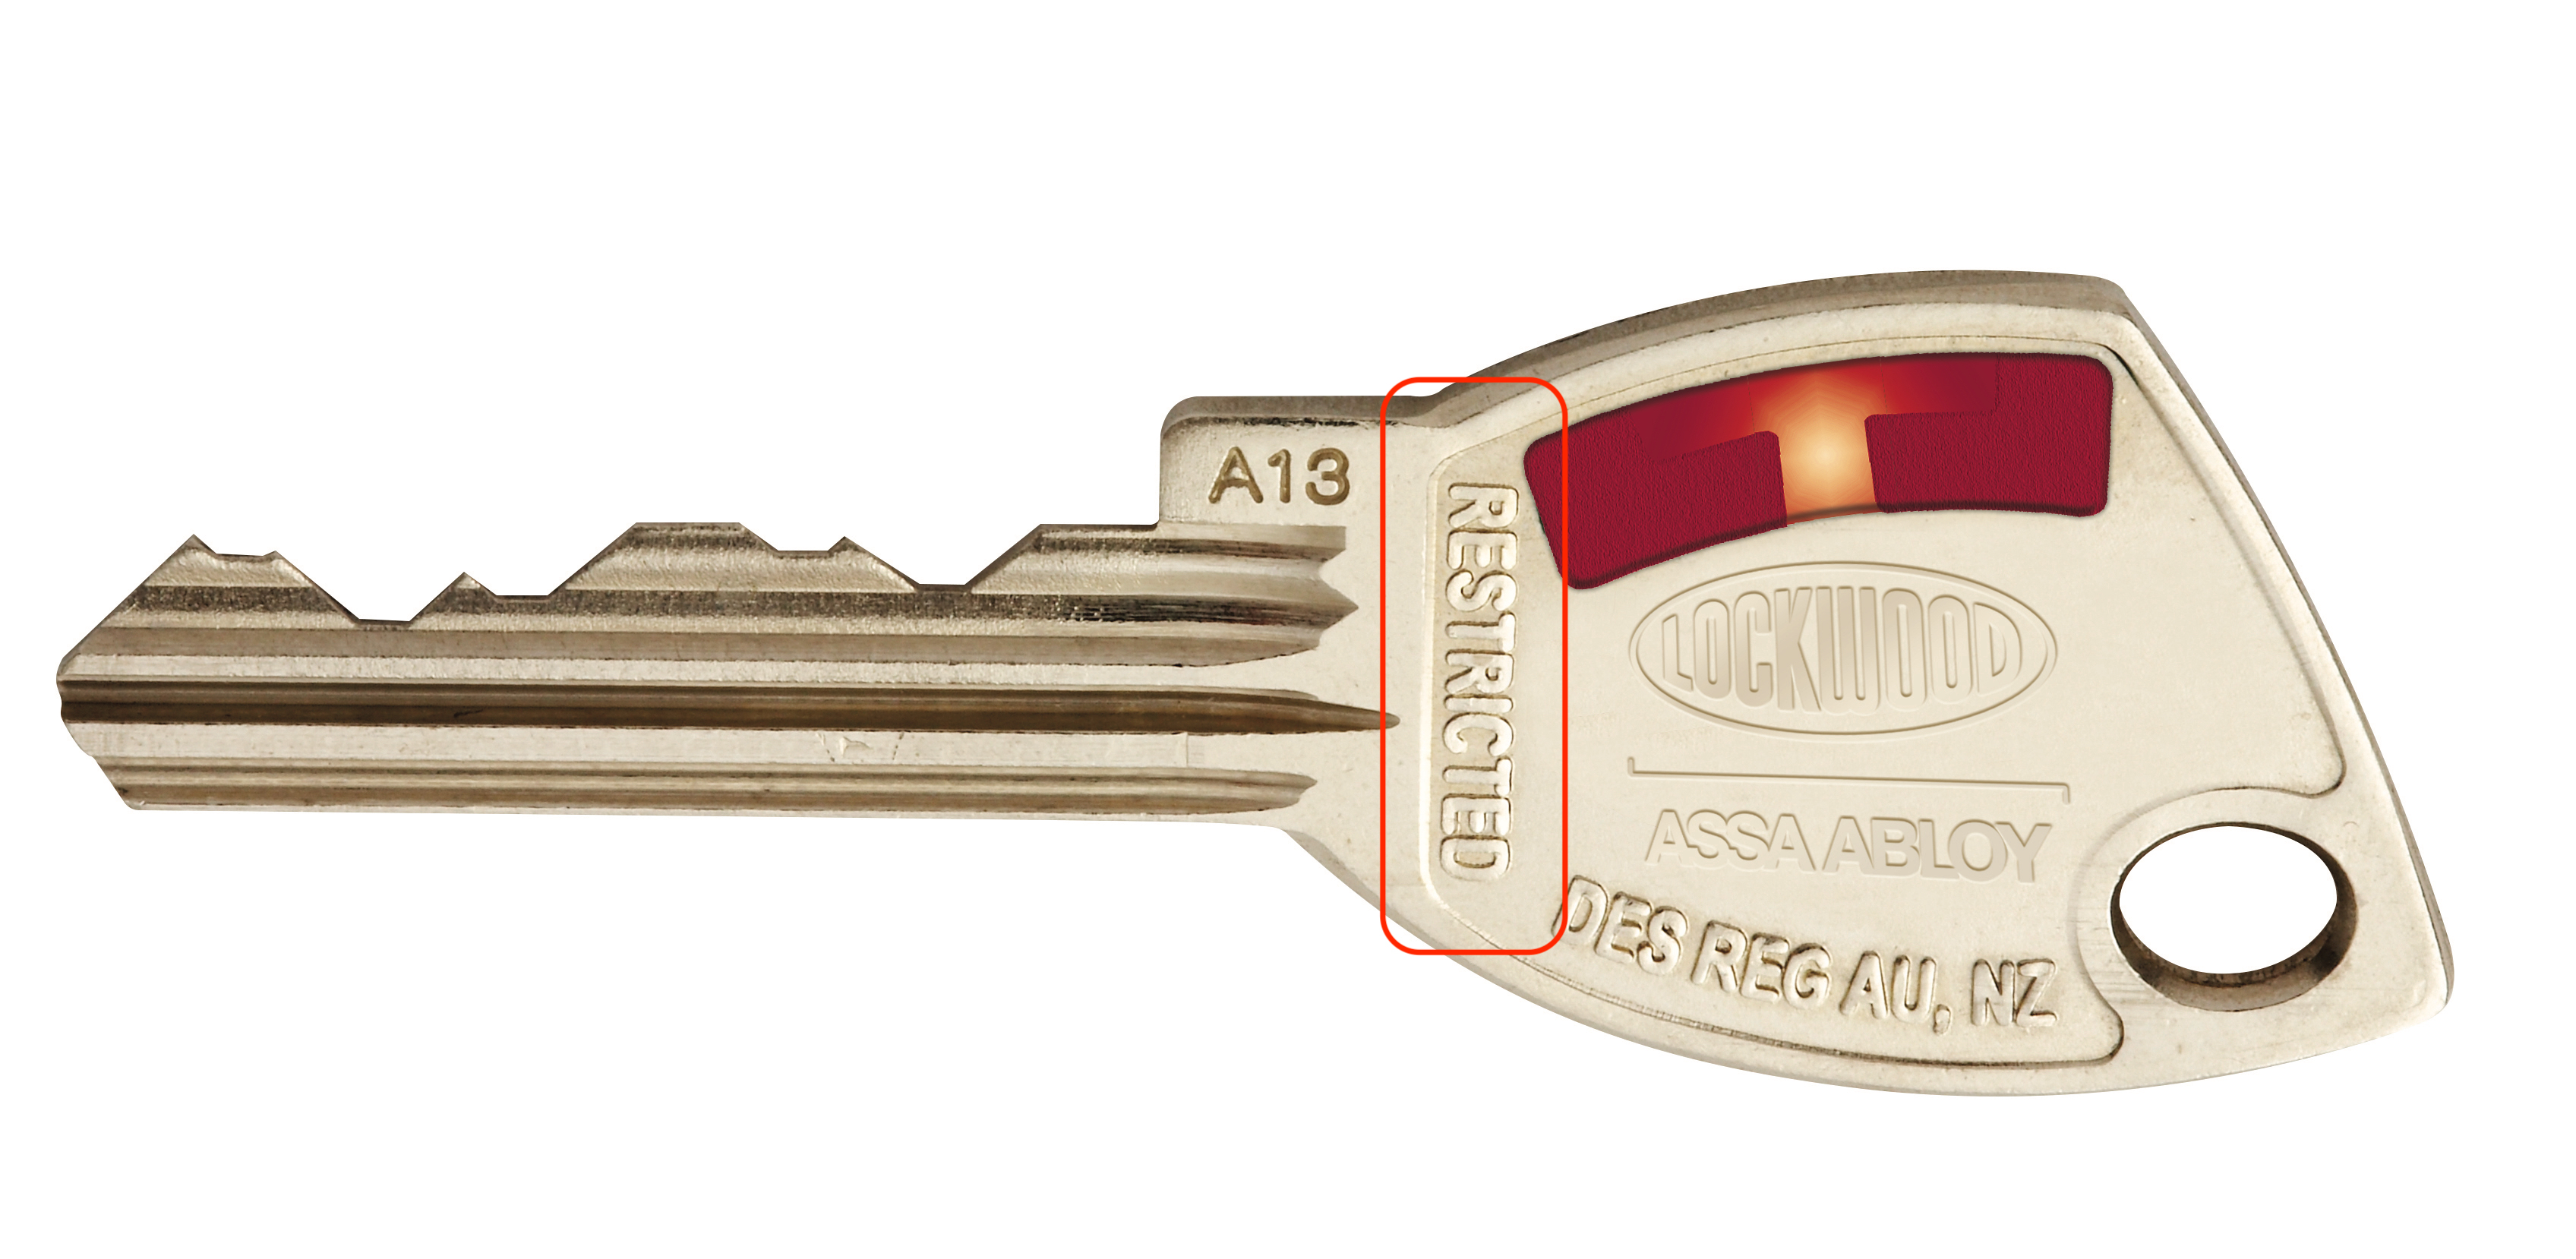
Ethical locksmiths will honour this and refuse to duplicate keys marked as restricted. However, there are advanced key cutting machines which can essentially copy a key (similar to 3d printing), which may be used to copy a restricted key.
Replace the Existing Core with a Better One #
This option is probably the most expensive enhancement you could make, and you could arguably just buy a better lock. However, replacing the core with another one with a more restrictive keyway could increase the security of the lock and make accessing the pins or even inserting picks a nightmare.
The image above is from The Lockpicking Lawyer ( https://www.youtube.com/watch?v=GncYzuRMtb8), and despite how restrictive some of those keyways are, they may still be pickable by skilled individuals.
Summary #
We can increase the overall security of a lower budget lock by:
- increasing the number of pins (for example from five to six)
- creating a tricky bitting order
- replacing regular key pins with security pins
- modifying the regular key pins into security pins
- optimising the layout of the security pins to maximise their effectiveness
- replacing weak springs with strong springs
- carefully threading pin chambers
Useful Links #
Custom Security pins:
- https://www.youtube.com/watch?v=m9i_IVrltsc
- https://www.youtube.com/watch?v=0Xg3PKoOKXc
- https://www.youtube.com/watch?v=1kZI1hicyo0
- https://www.youtube.com/watch?v=JkKCDjihZS0
- https://www.reddit.com/r/lockpicking/comments/gnnvq6/rattlerattlesnake_security_pin_variations_link_in/
Threading pin chambers:
- http://keypicking.com/viewtopic.php?f=9&t=7548
- https://www.lockpicking101.com/viewtopic.php?f=3&t=64071
Bitting:
Restrictive keyways: